Nov 27, 2011

Dual Purpose Dresser

I found this dresser several months ago at Impact thrift store in Hatboro, PA.  The brass handles and its exceptional curve appeal (ha!) are what drew me to this beauty.  When I inspected the dresser, I was pleasantly surprised with what I found -- solid wood, in great condition, the insides of the drawers were clean and spacious and the price was oh-so-right! 

i scored this dresser on sale for $36.  it just doesn't get any better :)

This baby had to be mine all mine.  And speaking of baby, I thought of an idea which justified why the dresser was coming home with me.  I've been searching for a dresser for our office, a.k.a. future baby room, for a long time.  The criteria for the dresser is that it has to work well in our office and also serve double duty for our future plans for the space. 

So, this dresser will not only fulfill my immediate need for storage in the office, it will also serve as a changing table when the time comes. 

Here are some examples of DIY changing tables I found on the internet:  

via Kelly Rae Roberts

via BABY Lifestyles

via Swanky Baby


If you find a dresser for a mere $36 in perfect condition and it happens to satisfy your specific design taste as is, I'd consider you INCREDIBLY LUCKY!  And since I'm NOT one of those people, although scored for a great price, this dresser needed a lot of TLC. 

Here's what I did...

First step was to strip the current paint (several layers actually) off the dresser.  I used Klean-Strip Stripper (shown below).  This is an extremely toxic product so it's important to follow the directions carefully for proper use and disposal.


About five minutes after application, you'll notice the paint begining to curdle.  After waiting about 10 minutes, I used a metal putty knife to scrape the curdled paint from the dresser. 

pretty crazy stuff, huh?  this has to be one of the more toxic products i've used to date.  i performed this step in my garage with the door wide open for plenty of ventilation.

Next, I performed my first step of applying the stripper two more times.  Depending on how many coats of paint your piece of furniture has on it, you may need to apply the stripper more or less. 

this is what the top of my dresser looked like after applying and scraping one coat of the stripper.

this photo shows some of the progress I made while stripping the paint.

Then, once I removed most of the paint from the larger, flatter surfaces it was time to work on removing the paint from the hard to reach areas.  For hard-to-scrape areas, such as the intricate wood work on the dresser's leg shown below, I used an old toothbrush and the head of a pen to scrape the paint off. 


Next up, I sanded all surfaces with a rough sand paper.  Then, I sanded the dresser with a softer sand paper that left the dresser with a nice, smooth-to-the-touch feeling. 


sanded (left) versus unsanded (right)

Finally, I finished the dresser and made it custom to my specific design taste. I painted the outer surfaces (except for the top) with three coats of Minwax PolyShades - Mahogony, left over from my powder room makeover.  This product is great because it has Polyurethane in it, a protective top coat great for furniture, so it saves you a painting step at the end. 

As for the top of the dresser, I painted one coat of Zinsser's top coat, and two coats of high-gloss white.   My inspiration to paint the top white came from this beautiful dresser, which is also a DIY project.

via Young House Love
I wrapped this project up by painting a protective layer of  Polycrylic on the top of the dresser.  And the finale:


close-up of the brass handles


intricate wood work on the dresser's legs

how awesome is this top drawer with the dividers?  i love it.

this dresser is the perfect storage solution i needed

i chose a high-gloss white for the top because i love the modern, sleek look of it.

Jun 23, 2011

Patio Set & Outdoor Pillow Covers

I'm excited to tell you about this mini revamp.  I found my wrought iron patio set on the side of the road about two years ago and some change.  Aside from alot of chipped paint and some rust, the set was in great condition - nothing that a good can a spray paint couldn't fix.  I spotted it on the way home from work just a block from my house.  I raced home and told Rob what I found and told to him hurry up and follow me in his car.  We snatched it up in seconds and off we drove.  Score!!! 

I knew we'd be moving into our town house soon and that I'd want a nice patio set.  So the timing on this find was perfect!  I saved us a couple Benjamins (at a minimum) that's for sure.  Several weeks after we officially moved in to our pad, I borrowed a friend's power washer and Rob gave it a good scrubbin'.  Once the patio set was dry, I sprayed it with a fresh coat of white Rustoleum paint. 

Well that was almost two years ago I gave it a fresh coat of paint.  If you're a project junkie like me, you probably get tired of things around your home pretty quickly.  This year, I decided that the white just wasn't working for me any longer.  We got a cute black outdoor table (which is actually designed to look like wrought iron) and four black chairs as a shower gift, so I thought I'd spray paint the patio set black so that everything matched.

before.  here's our table in white.

rustoleum is the best spray paint because it prevents rust (which is important for outdoor furniture) and it's great for all sorts of surfaces such as metal, wood and plastic.

my neighbors think i'm nuts because i don't bother to lay a drop cloth outside.  why would i?  as soon as the grass is cut the paint is no longer there.  ha!
after.  here's the patio set in black.  much better - don't ya think?
Did you notice those awesome pillows?  Yup.  I made em'.  I started to tell you about this project in my New Sewing Machine post.  As I mentioned, these pillow covers were the first thing I've ever sewn.  I dunno...I think I did pretty good.  I definitely got better and better with each one.  The pillows are just the perfect touch to my newly revamped patio set.  Ahh.  These DIY moments make me so happy.


check out that super straight, straight stitch.  not shabby for a beginner right?

here, i wanted to show you another stitch angle.

yikes.

I told you that I got better with each one.  The pillow above was the first one I sewed.  I folded too much fabric for the hem which left me with a shortage of fabric coverage in the back of the pillow. 

just your basic envelope pillow case.  easy breezy beautiful cover job.

see, my pillow covers got better and better as i went.  full coverage here.
Rob teases me that Brother is only a phase, and that I'll get over the excitement soon and it'll start collecting dust.  Not happening my friend.  Right after I finished my pillow project, I started sewing curtains for our family room.  For the time being I think I'll be plenty busy with sewing projects. 

Here's sneak peak at my curtains in progress.  I'll blog about these soon, too.


Jun 22, 2011

New Sewing Machine

After almost a year of wanting a sewing maching, I finally bought a basic Brother model.  I did some online research and I decided on this machine because it had over 200 positive reviews, the majority were from beginners like me.  My basic Brother machine was only $94 with shipping at Walmart.com. 

I've never sewn anything in my life but I knew that I could do it and I've always wanted to sew my own curtains and pillow covers.  Here's a picture of my Brother:

The first thing I did when Brother arrived was take it and all of its parts out of the box and lay them across the table.  Then, I read the entire manual from front to back.  Again, I'm a beginner, so reading the manual was an absolutely necessary step.  After I read the manual I learned all the basics such as winding the bobbin and threading the upper and lower part of the machine.  I took about an hour to read the manual and then I thought I was ready to roll.  

Was I nuts?   
 
sorry for the crappy iPhone pictures.  my phone was all I had to work with because the camera died and the charger was left in san francisco.
Ugh. I wanted to throw Brother across the room and smash it into peices against the wall.  Just when I thought I was ready to rock out with my new sewing machine I COULD NOT figure out how to draw up the lower thread.  I was so freakin' close and it was the only step keeping me from sewing.  After an additional HOUR of reading and re-reading and re-reading the manual, a VERY STIFF vodka drink (which I promise wasn't the cause of the problem) and a half of spool of thread, I gave up for the night.  I was too tired to read the small manual print another time and it was approaching midnight. I threw in the towel.

Of course the next day at work the only thing I could think about was my failed attempt at sewing.  What the hell was I doing wrong?  I talked to a friend at work who has been sewing for years and told her how I was having a hard time drawing up the lower thread.  She drew a diagram for me explaining how I should pull the thread through the machine.  My work bud gave me hope again.  She lifted my morale up and I was feeling like I could definitely do this again.  So the second I got home from work I sat down in front of Brother with my work bud's diagram in hand, never thinking to kiss Rob or Roxy hello, and gave it another shot. 

Fast forward an HOUR.  Fu*#!!  Breath.  Sh*&.  Ugh. Really? What the hell am I doing wrong???  My frustration was taking over at this point and I was border line crying.  This is when Rob sat down next to me and asked, "Babe, do you want me to pull up YouTube videos for you?"  This was super sweet of him to ask, especially since I hadn't said hello to him yet.  But what did I do?  I freaked on him.  I didn't want help. I wanted to punch Brother. And why the hell didn't I think of YouTube???  Goodness.

Several minutes passed and I chilled out.  I watched bits and pieces of "how to draw up the lower thread on a sewing machine" videos.  I finally figured it out.  I'm so glad I watched YouTube videos because I was so off on what I was doing from what actually needed to be done that I would have never figured it out on my own. 
Now, I was ready to rock with Brother.  Crossing my fingers.  I didn't have any swatches to test stiches.   Only people who know what they're doing have swatches of fabric to test different stiches, not this chic.  So I grabbed an old rag from the kithcen and started sewing for the first time ever.  I was so excited.  I couldn't wait to pick out fabric for pillows. 

The follwing day (this is now two days after I took Brother out of the box) I went to Joann after work and found an outdoor fabric on sale for $6 a yard.  And just like that I decided to sew pillow covers for my outdoor patio set.  I still had no idea how to sew a single thing, I just knew I'd figure it out.  I snatched up four yards of the fabric for $24 and four pillow insert at $11.99 each for a grand daddy total of $72.  I was so excited to start sewing that I didn't care I was paying full price for pillow inserts.  Now that I know better I'll never buy them again unless I have a coupon or they're on sale.  I could've bought four pillows at HomeGoods, already covered, for less than $72.  I was starting to think Brother wasn't a good idea. 

i turned my back for a second and roxy sprawled across my fabric.  she always gets involved in my projects.

When I got home from Joann, I YouTube'd videos on "how to sew a pillow cover."  I found a super easy tutorial on how to sew basic envelope covers.  

here i'm folding the ends for the hem.

i stuck pins in the folds to hold the hem in place while i sewed.

i used a basic straight stitch on the pillow covers.
Two hours after I watched YouTube videos on how to sew envelope pillow covers, I had myself four outdoor pillows for our patio set.  Not sure if two hours is a long time - I'm guessing it probably is.  But for an amateur I'll take it. 

Stay tuned for the final product and pictures of how I revamped our patio set...coming soon!

Have a good night.

Jun 13, 2011

Kitchen Inspiration

I wanted to tell you about the outdoor pillow covers and curtains I sewed, but it wasn't until my camera died that I realized I left the charger plugged into the wall at a San Fran hotel.  Total bummer.  Anyhow, Rob ordered a battery charger for the camera from Amazon so I should be able to fill you in on these projects within several days - once I juice my battery back up. 

In the meantime, I've been taking pictures with my iPhone.  Although I think the iPhone takes pretty good pictures, they're not the best photos to enlarge.  The iPhone is the only thing I have to work with right now so forgive my not-so-perfect shots.
Tonight I want to share my kitchen inspiration for our Kitchen Makeover - Part II.  One of the first rooms we tackled when we moved into our town house almost two years ago was the kitchen, found here

When we decided to install "Kashmir White" granite countertops, I began searching images on Google to see what other people did.  I knew that I wanted a lighter, more modern, cleaner and sophisticated look.  We talked about painting the kitchen white to open it up and make it feel more airy.  Personally, I wasn't crazy about the "white" idea.  White reveals smudges and dirt -- and with a 60 lb. English Bully brushing up against the walls all day long, smearing who know what along the way, white was definitely a no-go.  What I had in mind (which I had to convince Rob of since he has a hard time visualizing) was a cool, light grey color that tied in nicely with the Kashmir counters. 

Anyhow, here's some inspiration images I found on the internet that caught my eye:


We knew we wanted to install a backsplash.  I was thinking white subway tiles, but I was afraid the kitchen would be too white.  After numerous trips to Lowe's and Home Depot, and about six different backsplash samples, we decided to stick with a subway tile...just not white.  The slate backsplash we chose can be seen in the images below. 

One thing I have to add as part of Kitchen Makeover - Part II is a chandelier, which will most certainly bring in the sophistication I'm looking for.  We pondered buying a chandelier from Lowe's for around $139.  But I remembered seeing amazing DIY chandeliers online two years ago while scowering the internet for all sorts of inspiration, and before I started my blog. 

Check out these awesome chandeliers:


I KNEW I could score a basic chandelier from a thrift store with no problem -- I spot them on my thrifty travels ALL. THE. TIME.  I wonder if the people who throw them out wish they wouldn't have if they saw what they looked like after these quick DIY transformations.

So when I saw this sassy brassy beauty below, you know I had to snatch er' up.  Take a look at our old new kitchen chandelier!!


I had to have Rob hold her up there so I could see how awesome she'll look.
Anyhow, I will post the full before and after of our Kitchen Makeover - Part II as soon as my camera battery arrives in the mail.  As for the chandelier, I can't wait to make it over. 

Have a good night.

Jun 8, 2011

So Far From Over

Hey Everyone!  There are no words, big enough apologies or good reasons why I haven't posted on my blog since MARCH 6th.  I suck. 

Quite frankly, I'm embarrassed.  I enjoy writing this blog and sharing my stories. I'm passionate about inspiring people with my projects and helping readers become thrifty designers, smart shoppers and ambitious DIYers, so that one day they'll pause and look around into the individual rooms of their home and think, "Wow.  My house is pretty awesome."  So I understand it may be hard to believe how much I actually enjoy writing my blog -- when I haven't written in three freaking months. 

I have not given up on my blog and my first home makeover journey.  It's certainly unlike me to not finish something that I've started.  My makeover journey began back in February of 2010 and it's so far from being over. 

In fact, although I have been mute for the past three months (vacationing, trying to figure out what career path to take, DIYing, watching ALOT of  the Real Housewives and Bethanny Getting Married), I have also been keeping myself quite busy with projects.

So without anymore blah blah blah-bing, I'll jump right back into the swing of things and show you hightlights of what I've been up to...

we made some kitchen improvements:  purchased new counter tops, added a backsplash and re-painted.

rob scored points when he snagged this Bassett table many months ago at a thrift store for $40.  but then he quickly lost all points for using an electric sander in the LIVING ROOM.  WTF.  anyhow - it's a nice, solid wood piece.  we finally got around to sanding and painting it.

we spent a week in san francisco.  so gorgeous.  totally love blue bottle coffee...and so much more.


yup.  I finally purchased a good ol' sewing machine.  did my research and got me a decent beginner one.
not gonna lie...i'm kinda good at the sewing thing
.
 

searching for the most perfectly fabulous fabric prints to transform into bedroom and kitchen curtains.
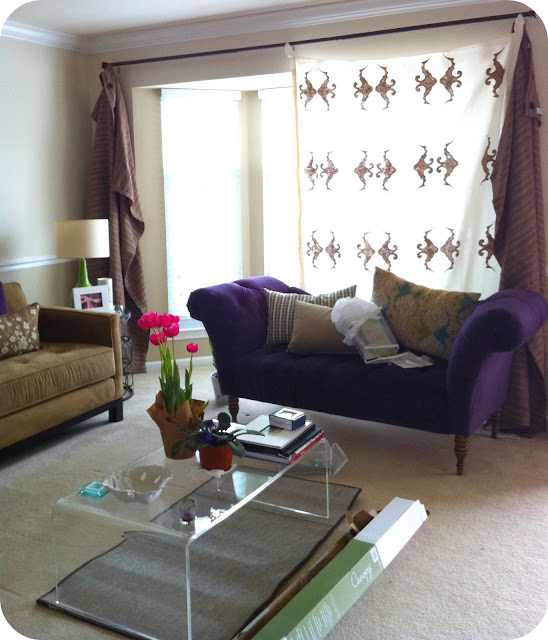
i have a crush on the color purple - i'm drawn to it
stenciling...

...and more stenciling


apartment hunting for roxy.  found her a nice abode at IKEA for $6.

buying bedroom furniture - for prices you wouldn't believe.

planting flowers and herbs and making flower beds
meeting my nephew, Caiden, for the first time.  he lives in florida with his mom and dad.  precious.


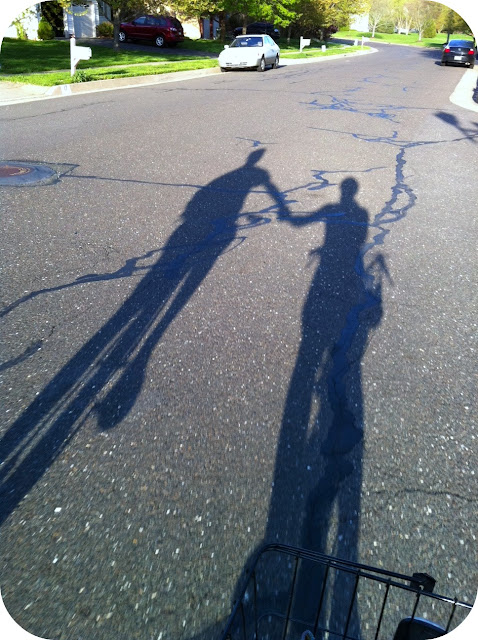
going for long bike rides

inspiration searching for ideas on how to transform this $40 dresser.
 just some designs that caught my eye...


Sorry for my lack of blog enthusiasm.  I hope you like the images I shared and that you keep checking back for the full behind-the-scenes scoop on these projects. 

Have a wonderful night!